Use Amazon Direct Publishing for Classroom Content
It’s 2021 and it’s time to make Amazon Direct Publishing work for you (instead of the other way around). Amazon Direct Publishing or Kindle Direct Publishing is an amazon hosted website that allows you to self-publish content through Kindle or physical books. I originally wanted to create blank journals that were teacher-centered to help teachers with their content needs but this goes above and beyond that. I was able to create journals specific to my needs with very little work involved. For example, the first journal I made had space for group assignments, literature circles, and notes, in a format that fit my needs. Once I created the journal it was easy enough to just upload it onto the KDP site and make the adjustments I needed.
Step One: Getting Started
Create a Google or Microsoft Word document with a page set up for whatever size or shape you want your book to be in. For me, it was 8.5 x 11 inches as I wanted something roughly the same size as a sheet of paper and typically prefer larger journals over smaller ones. You will have to set your margins to a different size, however, bringing them to 1.5-inch margins versus the standard 1”. This is due to specific bleed requirements when printing materials. You can set this later but it may affect your overall formatting. The margins are important if your format is a journal or something with specific slots as they will shrink and shift if not sized properly in the beginning.
If you really want to get into customizability you can use Canva.com and create a more unique option.
Step Two: Creating Templates
Once your document is set up, create templates for whatever you wanted to make. For me I made a journal that had tools for English, such as literature circles and group assignments. This can be extended to any subject area and grade level. For example, I’m planning on creating a sectioned guide for first-year English teachers that gives them specific tools to create assignments and stay organized.
A few things you do need to consider are font size, font type and overall structure of what you want. The templates can range from strictly lines on a page to using table tools to create customized lists. Choose something that is easy to read and reasonably sized.
Step Three: Populating Your Journal
The templates you use are what is going to populate your book. For example, I created three templates: groups (1 page), literature circles (spread or two pages), and notes (one page). I made sure to stick to either one or two-page spreads to prevent issues with overlap and numbering. Once I was happy with my templates it was a simple matter of using the page break, copy, and paste functions within my chosen program. By using page break you ensure that there’s little to no run on the next page. There is a user error involved so you will have to review your pages once you’re done.
When I did this, I made sure to figure in around 30 pages of groups as I do group work that’s not necessarily literature circles, 15 literature circle spreads, and 40 pages of notes, bringing my total page count to around 100 pages, the size of a standard college-ruled notebook. This worked for me, however, you might need more pages and can adjust as needed.
Step Four: Exporting Content
Once your journal is to your liking, export the file as a PDF. You can use a .docx but I find PDF file types don’t shift as much when you print versus .docx. By exporting as a PDF you ensure that your document will retain the original shape and structure that you created with your templates. Bear in mind that the Kindle Direct Publishing programming may kick back some errors but it is far less than if it were a .docx file.
Step Five: Create a Cover
Navigate to Canva.com. Canva is a website that works similarly to Microsoft Publisher in that you can create all sorts of graphic designs. They do have a “Book Cover” option, however, the sizing may not fit your desired print size. Here you can choose your book cover color and design your cover however you’d like. As it is a free website it does lend itself to having some premium content but that shouldn’t prevent anyone from creating something they’re satisfied with. Your cover size should be double your page size or it won’t upload correctly.
If the size is not accurate to your book size you can easily resize using the resize feature and scaling the image that way. For example, an 8 x 11 inches journal is actually 17.85 x 11.25 inches due to printing bleed.
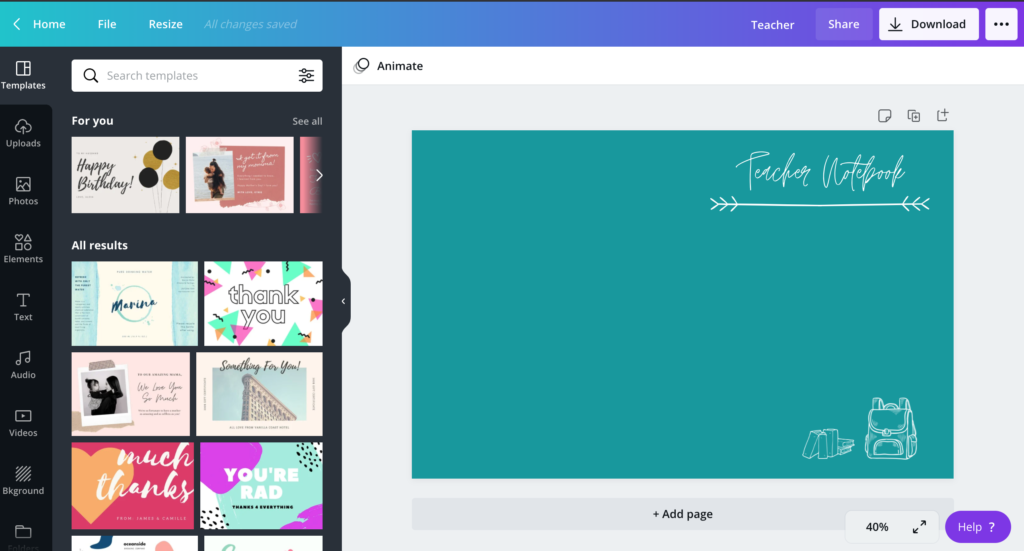
If desired, you can actually upload your own photos to further customize your cover. I chose to set the background to a neutral color and incorporate gender-neutral graphics. You can include anything from shapes to text boxes making it a versatile option for creating a cover. Just make sure you download it as a PDF Print as that will be the only format Amazon will take.
Step Six: Using Amazon Direct Publishing (Kindle Direct Publishing)
As soon as you set all of your creative content this is when you’re going to have to do a little troubleshooting. Navigate to Kindle Direct Publishing (via Amazon) and create an account. Once you do this, you’ll see the following screen.
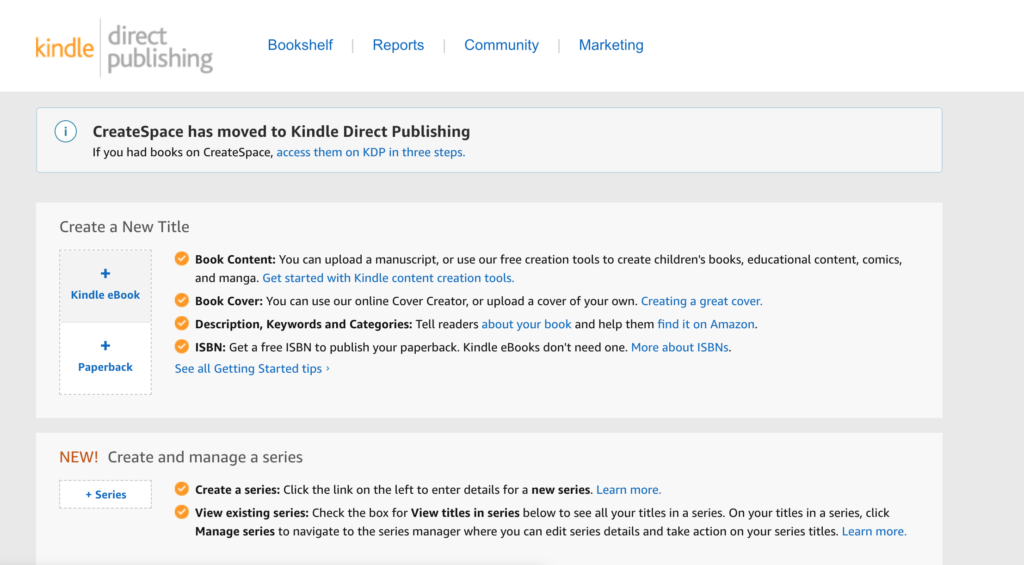
Here you will manage and create your Titles. I opted for the Paperback novel to have a physical journal printed. As soon as you choose a book type then you can start creating your title.
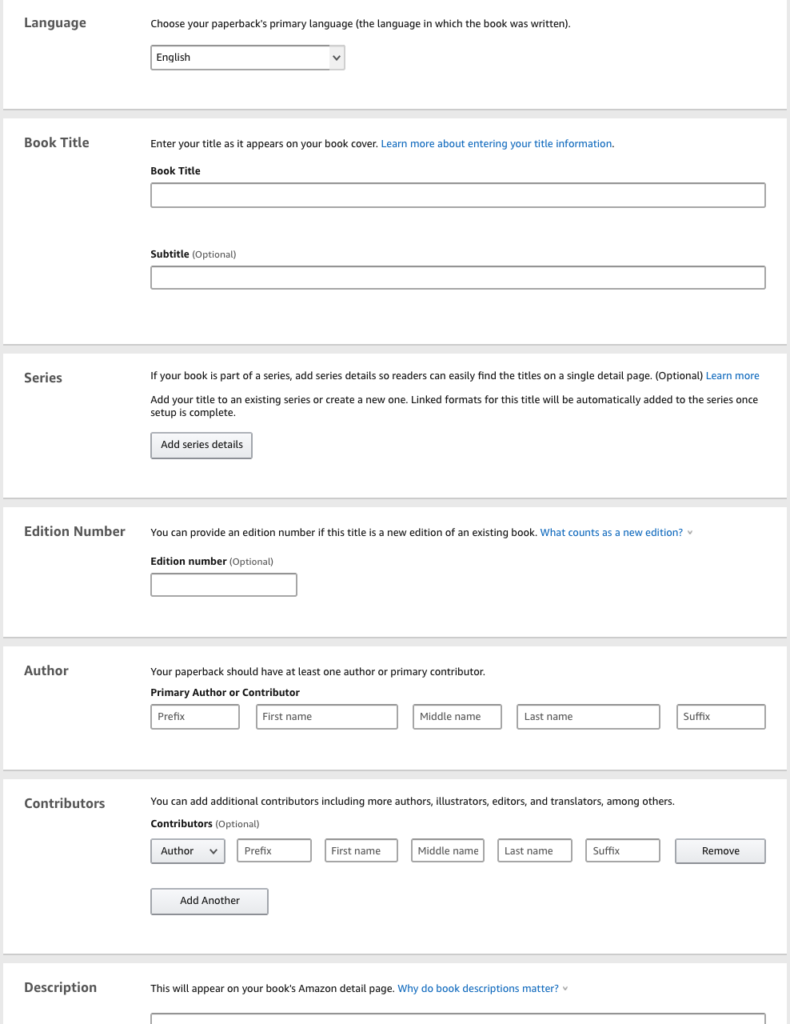
This is where the magic happens, you’ll set a Title, Subtitle, Author, Contributors, etcetera for your new journal or book. Depending on the content you plan on publishing this may be more important to some than others. I chose my title based on its use, “The Disorganized Teacher’s Notebook”.
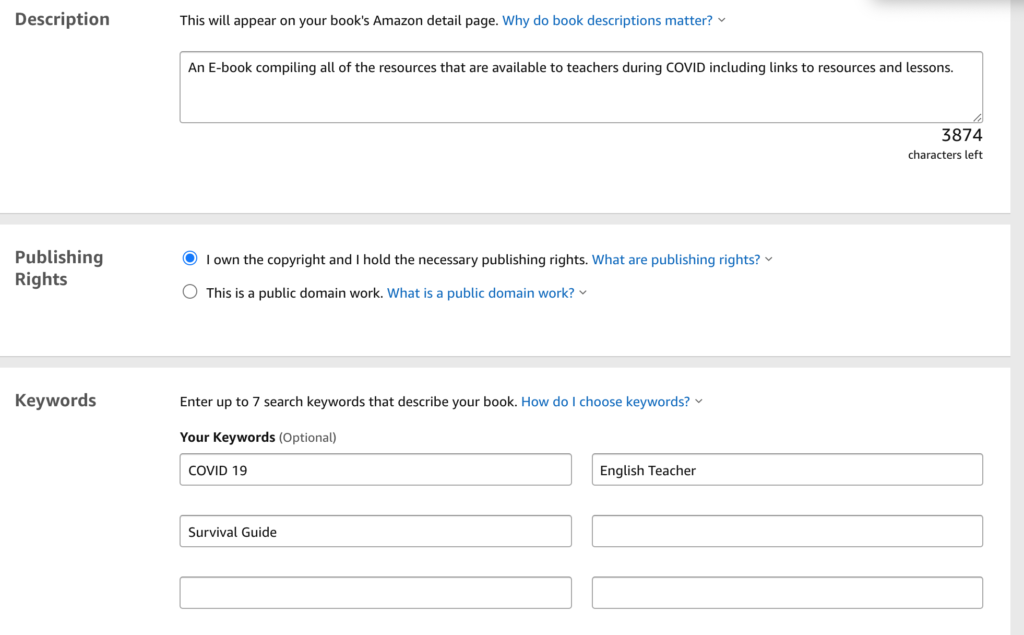
After setting your basic information, you are required to write a short description of your notebook. Depending on the purpose of your publication, whether personal or commercial use, your description may vary. For my literature circle notebook, I chose to write a blurb that fit both personal and commercial use needs.
Here is where things get tricky: the categories and keywords. Categories are how your book will be categorized via Amazon. Keywords are how your target audience will find you. This can be content-specific or broader. For example, I created a fake novel geared towards teachers who need content for distance learning. I set my keywords as my target audience, content range, and purpose.
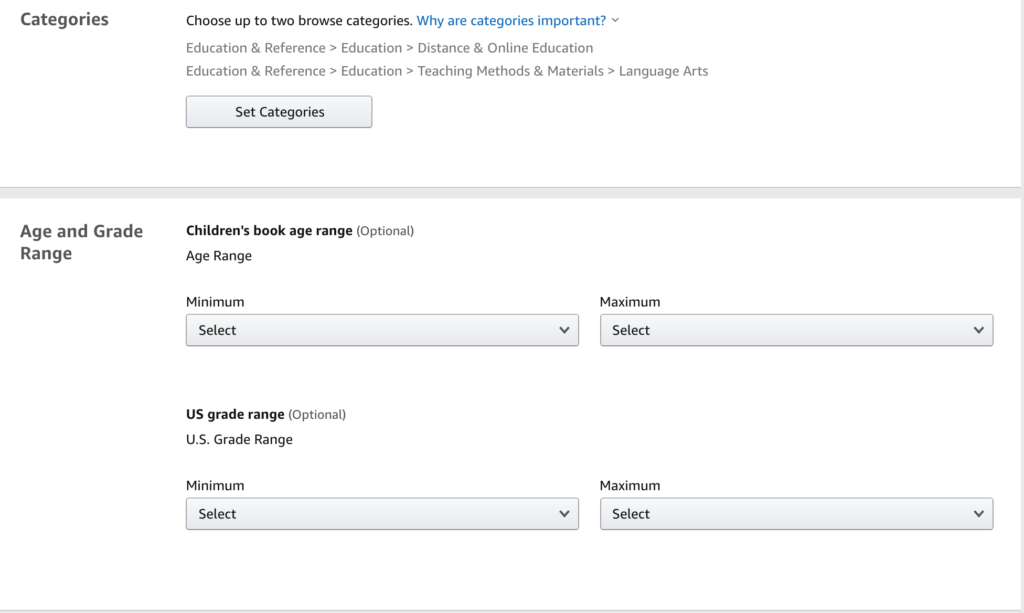
Categories, however, are how Amazon organizes its content. These create a sort of funnel that shoppers use to find content. You do not have to use these, but it does help if you want to monetize your content. You can only choose two categories so you will need to decide which ones work best for your content.
Step Seven: Book Content
This is the trickiest step in the entire process. By far the most time consuming and stressful part save writing the manuscript itself. The first two steps: ISBN and Publication date are easy. They can be auto-generated. The next steps are a little trickier.
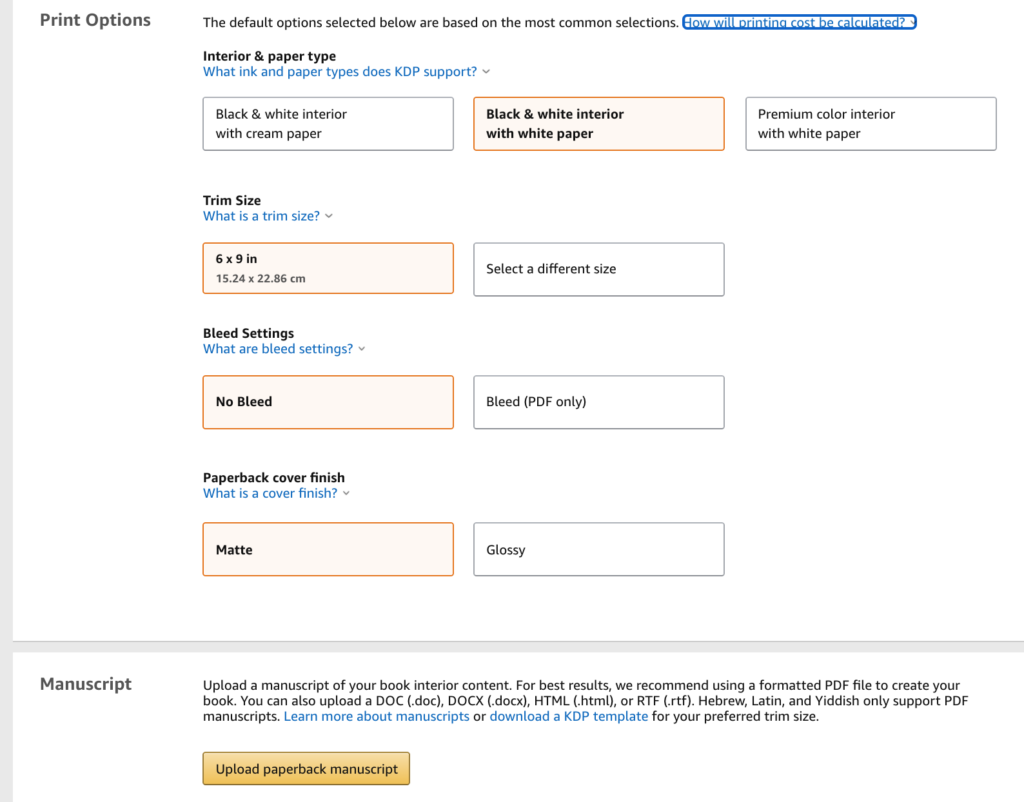
The print options are deceptively simple. They tend to cause problems when it comes to previewing the content later to the point that some may choose to default to a standard page size to avoid having to change dimensions of your writing. The “Trim Size” portion is what tends to be the most taxing on your time as a misstep in trim size can lead to an hour or two of adjustments on the original document to meet the criteria. I prefer to default to a standard 8.5 x 11 inch trim size primarily because I prefer larger notebooks and to cut down on any issues later. If you prefer a smaller notebook, the standard 6 x 9 inch option is still a viable option, however, you should be mindful of your margins and page setup on the original document.
The larger the book, the higher the print cost, so if you plan on monetizing your content plan on balancing everything. For a 112 page notebook, the print cost is around $2.03 USD. A 224 page notebook runs around $4.08 so the pricing does scale to a degree.
The manuscript upload is relatively easy to use, I would highly suggest a PDF copy as it should avoid any reformatting errors that exist within the Microsoft Word and Google Docs sphere. After uploading your manuscript you can either use the cover creator in KDP or upload your cover you made on Canva or Publisher.
Step Eight: Checking your Manuscript and Cover for Errors
The next step is to preview your book and check for errors. Depending on the size of your content it may take a little longer to process.
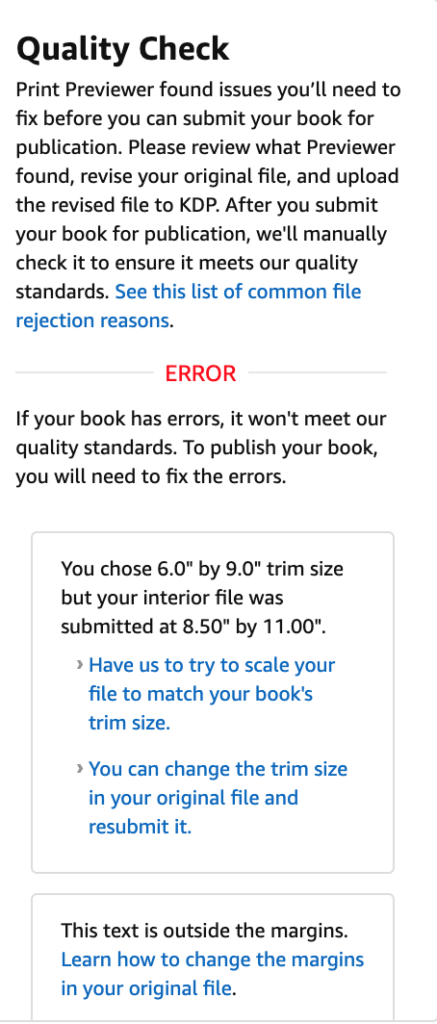
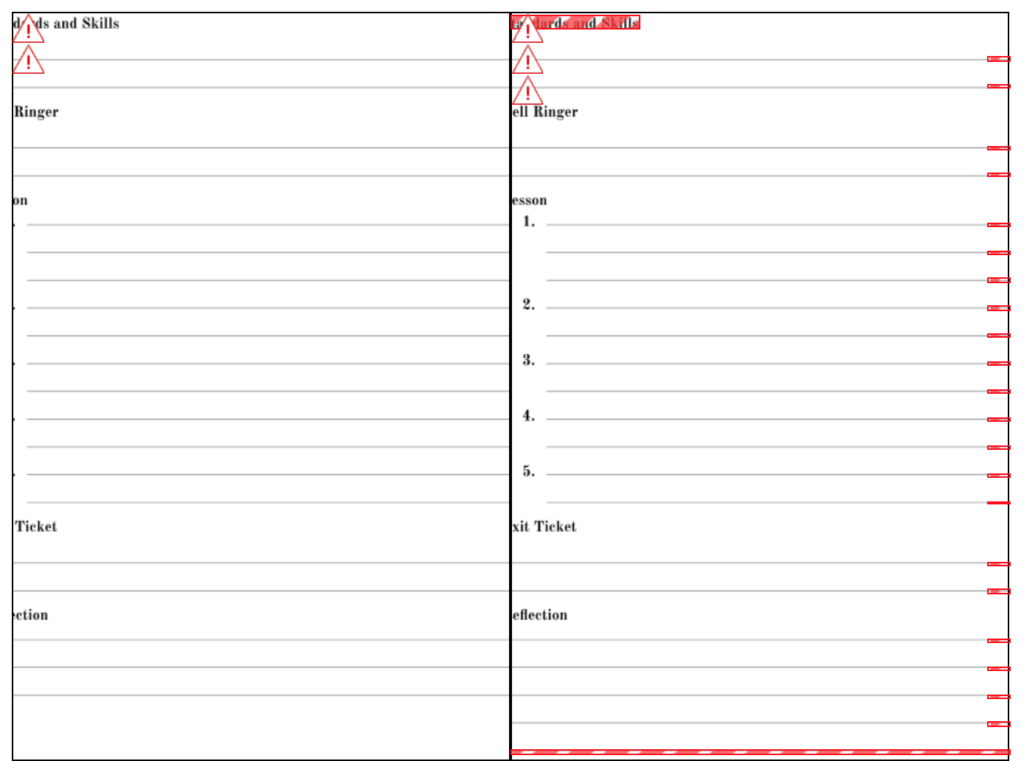
Troubleshooting is relatively easy as the previews do provide instructions as to what you need to change before printing. This is where you’ll see sizing, margin, and content errors. They will provide steps as to how to fix quality errors before publication. To move to the next step, you MUST pass this step.
Step Nine: Pricing and Publishing Rights
Pricing is determined by the creator of the content. Using the widget provided you can adjust your pricing based on your own use, personal or commercial. For my first publication, I chose to price at $6 USD. This meant that I would get only $1.41 USD after royalties but kept it inexpensive after printing costs to keep it affordable for other educators. You are also able to decide how you want distribution to work and the price in other countries. You can choose to price it differently for Kindles than traditional print books.
Step Ten: Publish
Congratulations! You’ve published your first book! It takes up to 72 hours to publish via Amazon, however, once that timing is up you should be able to order “author copies” for your own use. I purchased 5 so that I could distribute them to my coworkers to get feedback for future books.
Thank you for reading!
Please tag me on Instagram, Facebook, and Twitter when you publish your new book so that I can see all of the awesome content you’ve created!